Monday, January 9, 2012

The Pantry

The new year started last week.  Whenever the new year starts people seem to want to get organized. 

While the calendar changed last week my life revoles around the school schedule.  So for me the year starts in September and ends in June.  When the school ended last summer I was looking forward to...organizing our closets! We had moved in a little more than year before and hadn't done much with the closets since. The morning after the last day of school I was up at 9 and tearing apart the pantry.  Fun, I know!

There many awesome looking pantries out there, do a quick pintrest search or pick up a home magazine and you'll see plenty.  However, I was looking to finish in a weekend and use organizational tools I had on hand. And of course I couldn't change the size of our pantry.

My method was pretty simple.

1. Take (blurry) before photos


Good luck finding anything!


2. Empty everything out

Hello paneling! 
3. Be shocked at how much food there was. I realized never need to buy canned beans again.  Reorganize food by type.  Put often used/favorite products in containers.  I did have a buy a few canisters and jars, but was able to repurpose many baskets.


4. Paint the walls, ceiling and shelves- going with my "use what I have" theme, it's the same paint as the dresser/buffet which shares the same space. We also added a shelf. The bottoms of the shelves become the tops, because they were covered in some kind of vinyl that did not come off nicely.  They couldn't be made smooth enough to paint, but needed to be covered.  I couldn't find a contact paper or shelf liner I liked....so I  decoupaged wrapping paper the underside of the shelves.  

What a difference paint makes, huh?


5. Refill pantry.  Keep items organized by type/use.  The most frequently used are at eye level/easiest to reach.  I also added 3 small and 1 large hanging basket things, with tags.  I also put some of those tiered shelve things in for cans and boxes.


 6. Paint the inside of the door with chalkboard paint.  This is a list of the food in the freezers- but that is another post.  


It took me a full weekend, including trips to Target, Home Depot, and the Container Store and painting.  The result was totally worth it!  Is it beautiful and amazing like the magazine ones? No, but it is far better than it was.  And it is functional!  We've I kept it pretty organized and have been working through the crazy food stash since everything can be seen there is no need to buy duplicates. 

1B. And has happens so often one project lead to another. I tackled my "staples" pantry.  No before photo, but basically new flour/sugar containers and better organized the oils and vinegars.   


What color is your pantry?

Oh, and I tackled 4 other closets last summer...stay tuned!

Sunday, January 1, 2012

Happy New Years!

Happy New Years!

Nope, no year in review post for me....that's a little more time and thought intensive than I want to do.
And no 2012 goals...yet.

Just a simple recap from last night.  We went with 3 other couples to the Lincoln Restaurant.


It was a speakeasy themed event, so we dressed the part. It was a great time!  They had 20's style drinks and a good band.  We had a blast, it was a perfect way to ring in the new year.


The boys also looked equally fabulous, but I'm still waiting for the group shot.


The restaurant was also had beautiful decor, full of pin-worthy decor.   Have you seen the penny floor on pintrest?  Well, this place actually used 1 million pennys to create their floor.  Fitting of the namesake of course.

There was also an awesome multi-sized mason jar light fixture.  It was very very cool...too bad I forgot to take a photo.


This morning (well into the) afternoon, we toasted the new year with some fresh homemade bagel.  (get it??! toasted... bagel- I'm very funny) I made them Friday using Annie's recipe.  It was surprisingly easy. I liked have control of the size and toppings (we made sesame, poppy, everything and parm).  New York bagels they aren't but they are better than store bought...if I do say so myself (John ate two today, so I think he likes them too).

How did you usher out 2011?  Hope your 2012 is off to a nice start!

Sunday, December 4, 2011

Dare To DIY- Crafty Gifts

Sorry to be MIA- I've been busy enjoying holiday festivities. We've already enjoyed 6 activities- all since Thanksgiving!

That lovely busyness is part of the reason I did not participate in Kim's first two "Dare To DIY" events.

Dare to DIY  
I've participated in the "party" since Kim started this tradition a few years ago.  

This week is all about hand crafted gifts.  I love making homemade gifts for others.  Each year I make 3-10 gifts for the holiday season.  Some years a I do lots of the same things, other years I do  a few different items.  I also love doing food gifts.  This year I still have some holiday craft gifts in the works...these gifts have all been given and opened so I don't feel bad sharing.  
(Also all these gifts have been inspired by Pintrest....of course)


Owl Heat Pads 
 These little cuties were created using this free pattern ("thank you" to the creator!).  These guys are great- cute, fast and easy to make, all using scrap materials from my stash.  They are filled with rice, vanilla essential oil, rosemary and lavender herbs (from my friend's garden- she made the purple striped dude).  The backs are soft flannel and corduroy.  Nice, soft, warm, good-smelling and cuddly....the guy second from the left is mine- so I'm speaking from experience.    


Crinkle Toy
I've made tag toys before but never a crinkle one.  I have to say it was not easy and a bit frustrating.  The end result was less crinkly than I wanted but the mom-to-be was still please- I guess that's what matters.  And I have lots of other cute little friends to give me reasons for practice. 


Door Silencer
Another simple baby item I've never made before. And I might add, a genius one at that! I never would have thought of this if I hadn't seen this pin. I was a bit skeptical, but it worked on my craft room door. The silencer was very fast and easy to make.  I had all three "ingredients" in my stash.  


My sewing table and chair are currently covered with 20 different fabrics for the 4 other projects I'm in the middle of.  What are you making this season?

**need some ideas?  Go see what others made! 

Sunday, November 20, 2011

Start Of The Season

This is it!  The start of "the most wonderful time of year"!  I love it!

For me, it starts on Thanksgiving morning.  I have a tradition I love- I settle myself in front of the Macy's Parade and enjoy some goodies while writing Christmas cards.

I love Christmas cards.  I love everything about them- selecting them, writing them and receiving them.  I spend a lot of time each fall picking the design and photos.  I prefer to get a design from an etsy seller and then print them.

This year I used Natalie from Nattysuedesigns.  She has tons- pages upon pages- of designs!  I tend to like cards that a bit quirky with a modern design using fun wording and colors.  I also try to stay away from a motif that screams "Christmas" (for all our friends who don't celebrated).  She had many that fit my requirements, I had a hard time picking one.  Also Natalie was fast, friendly and so patient with my "tweaks" and requests for resizes.  If you are still card shopping check her out!

This year, for the first time, I'm doing postcards.  It is a bit more "green"- both economically and environmentally.  They should arrive today. I hope they turned out well.

Without further ado ....
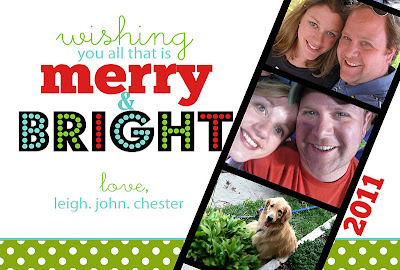
Our 2011 Christmas Card

If you are expecting one in real life and don't want to ruin the surprise- stop reading now!


Happy Holiday Season! 

*this post was not sponsored in anyway.

Friday, November 18, 2011

A Yummy Pintrest Success


Have you seen this Yumminess floating around the world of Pintrest?

crispy gnocchi pesto with tomatoes and goat cheese
                                                                                       Source: 1cupawesome.com via Leigh on Pinterest
This is my "during" photo.

There is no after....it was eaten too quickly!!  This was a super dinner dish- it was delish, required only a few ingredients, cames together fast, and yet was impressive.  You could totally serve this to vistors...in fact I did!

This isn't from Pintrest...but it should be there!  My friend made it/taught it to me on the same evening.      Using rolled pizza dough to make garlic knots.  These are far better than those that come with delivery pizza.

1. twist open can


2. cut the dough into strips 

                                    
3. knot the dough


4. mix together EVOO, garlic powder and salt
Brush on knots, bake according to directions
(before serving sprinkle with some chopped fresh greens-basil, parsley, etc.)

Again- no after photo...because they were too good.  Light, fluffy and great flavor. 

ENJOY!

Have you found a great recipe from Pintrest? Please share! 

Thursday, November 17, 2011

Pin Plates

Another Pintrest project completed! 

I know everyone has been impressed and inspired by Mrs.Limestone's idea.
                                                                                         Source: brooklynlimestone.com via Leigh on Pinterest

This is my version.  This two little plates were a Target clearance find. Since there were only 2, I thought "his" and "hers" would be cute Leigh-bellishments.  However, my handwriting is not cute.  I used the Silhouette to cut vinyl stencils.

They looked great...until I took the stencil off.  The paint bled badly. I was able to use damp Q-Tips to clean it up a bit.  If you look closely it still isn't perfect- but I think they are pretty cute.

After removing the stencil. 


I have a few more clearance dishes to dress up.  I think I'm going to make them for our Cookies and Cocktail party, after I find new stencils.  

Wednesday, November 16, 2011

P Squared

Another Pintrest success!

This lovely has been floating around for a bit.


My idea was to use the technique to create seasonally themed artwork. Then rather than using white, paint the canvas a seasonally appropriate shade. 

Since my drawing skills are lacking, I created stencils from online images.  My first plan was to print an image then use a sharpie to trace it on to the canvas.  I was counting on the sharpie to bleed through...didn't work.  Then I tried tracing paper...also a flop.  Finally I just cut and traced.

My Fall Creation: 


The Christmas Canvas:

The inspiration/stencil~ 

                                                                                      Source: restorationhardware.com via Jackie on Pinterest


Other than my initial issues of the getting the design on the canvas, this is was a simple, fast and easy process.  There are so many great ideas and uses for this project.  I can't wait to create another.

You should make one... but I have a few tips first:

1. use the thickest, puffy-ist paint you can find- to make thick lines!
2. since you'll be using thick lines... avoid detailed and intricate designs- especially ones with narrow gaps. Also round shapes or curves can be tricky.

3. use the same color puffy paint as acrylic (or as close as possible)
4. use a foam brush to paint

Anyone else use puffy paint lately?